 |
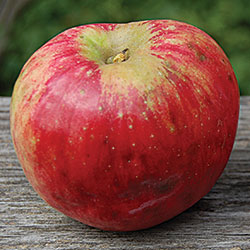
| My first apple arrived this spring. Kind of sad and lonely, single child and all. It's a Monarch (from England, where the monarchs are, Trump's royal delusions notwithstanding), one of the heirloom apples I purchased from Seed Savers Exchange in Deborah, Iowa. I first ordered five varieties in December of 2014 and reported about it on this blog in January, 2015. Seedsavers grafted the trees on M-7 dwarf apple tree stock, so they will only be 12-15 feet tall when mature. The trees arrived in the Spring of 2016 and that's when I planted the Monarch. The original plan was to plant them in parking (the strip of land between the sidewalk and the street), but I cut down our Douglas fir in the front yard so I had space for these trees, eventually planting four varieties: Monarch, Brown Sweet, Black Twig, and Knobbed Russet. I also planted a semi-dwarf peach tree. The Woodard was D.O.A., and of course Seed Savers refunded my money. About M-7 rootstock, from Extension.org: Formerly known as EM VII. Selected in 1912 from unknown parentage at the East Malling Research station in Maidstone, Kent, England. Trees on M.7 EMLA produce a semi-dwarf tree about 60 to 70% as big as seedling. Trees are moderately precocious and may lean with some cultivars and may require trunk support. Trees tend to produce many rootsuckers. M.7 EMLA has been widely planted since the 1960s with cultivars such as ‘McIntosh’, ‘Empire’, ‘Cortland’, ‘Golden Delicious’ and spur strains of ‘Delicious’. Trees with cultivars such as ‘Gala’, ‘Stayman’, and ‘Granny Smith’ tend to lean excessively and require support. |
Sunday, June 17, 2018
Monarch Apple
Tuesday, June 12, 2018
Pesto Chango!
 |
| Basil and parsley, both of which will make it into this first batch of pesto. |
 |
| Pretty much all the ingredients except salt and pepper. Getting down to the last of my yummy garlic. I'll have to hit the farmers market for a couple of months until the new crop is ready to harvest. The cheese in pesto is optional (keeps it vegan for those so inclined) and I always put it in when I cook with the pesto as the pesto stays fresh longer without the cheese, whether freezing it or merely storing it in the fridge. |
 |
| This first pesto I'm making uses walnuts. I find the flavor is deeper if they're toasted for a few minutes before using. |
 |
| This is a triple batch of sauce and it barely fits in the food processor. Take your time and pulse it. |
Sunday, June 10, 2018
Beet Greens, Chard, and Steel Cut Oats (Recipe)
 |
| Trader Joes is my go-to source for steel cut oats. Make sure you buy the regular slow cooking variety. |
Thursday, June 7, 2018
The Great Garlic Scape
 |
| A fairly large and robust garlic crop this year. I've raved about this wonderful Italian variety in previous blog posts. |
 |
| I think they're king of cute, like a pig's tail. |
 |
| Yikes. This is but one third of the harvest. I better get stir frying. Perhaps to make my go-to replacement for 鱼香肉丝, 鱼香茄子 yúxiāng qiézi, which replaces the pork with eggplant. Quite delicious. |
Monday, June 4, 2018
Red Russian Kale Collusion (Recipe)
In this rigged kale recipe, the red Russian kale colludes with lacinato kale in a simple one-bowl meal that will please even the most picky and partisan palates. Make it vegetarian or vegan. I modified and merged a couple of recipes (hence the collusion) and came up with this slow cooker version of a classic dish, made healthier with short grain brown rice. Leave out the dairy and you can be even more self-righteous. Red Russian Kale is the bomb.
 |
| Red Russian kale, an heirloom variety from Seed Savers in Deborah, Iowa. |
 |
| Lacinato kale, also from Seed Savers. |
Wednesday, May 30, 2018
Drip Works
Good news! The drip irrigation system I installed really works. Since I installed it last week, we have had consistent rain every other day or so, and I haven't had to water.
 |
| The tomatoes have really started to take off. I can't wait: 24 plants; 16 varieties of heirlooms. |
 |
| Unfortunately, the cilantro is always ready before the tomatoes. Hmm...plant later next year? |
 |
| Everything looks pretty good—no diseases and looking pretty healthy. Might have a few cabbage worms lurking but they're easy to get rid of. |
Thursday, May 24, 2018
Drip Irrigation: Because I'm an Environmentalist *and* Lazy
 |
| To enable the use of my hoops and cover, as well as trellises and tomato cages, which sit on the top of each box, I had to lower the sub main headers below the tops of each box. I started this by drilling 1" holes on each end corner. |
 |
| Then I used a reciprocating saw to clean up each notch. |
 |
| Next, I prepared each ½" sub main line for the installation of the barbed swivels to which each drip tape line would be attached. I used a 7mm punch for this, a great little time saving device well worth the 8 bucks I paid for it. |

 |
| Attached drip tape swivel. Only 35 more to go. |
 |
| One header down, five to go. |
 |
| Sub main attached to 2x2 header board and floating in the box. This design will also facilitate winter removal of the lines as all I have to do is unscrew the connector that attach it to the next box. |
 |
| The lines between boxes are enclosed in ¾" PVC pipe to prevent damage from heavy-footed bi-peds. I also used a piece of 1 ½" PVC to cover the connectors sticking out the end. |
 |
| After the headers are all installed, the next step is to attach each 8-foot piece of drip tape to each swivel. |
 |
| After pushing tape onto end of swivel, simply screw the cap over the tape. |
 |
| After all lines are connected, and water is flushed through the system to remove any possible debris, the end plugs are similarly attached to the drip tape. |
 |
| After careful placement across the box, each drip tape line is secured by a landscape staple. |
 |
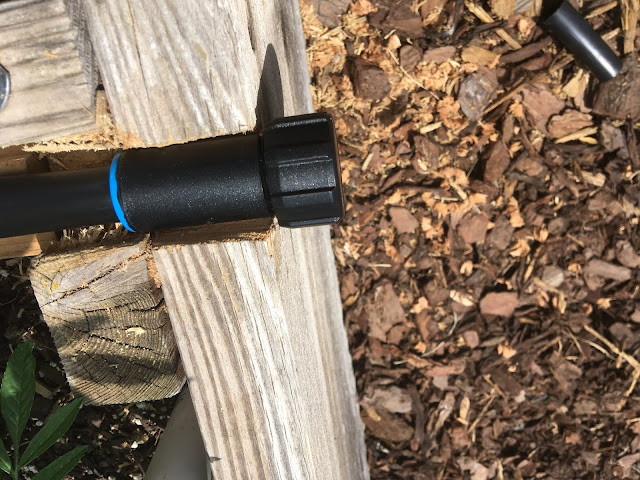
| Each run of sub main is capped off by a screw cap that allows the lines to be flushed as well as drained for the winter should you decide to leave them in place. |
 |
| This side of the yard is ready to attach to the water supply, in this case a hose coming from one of the two house spigots. On the end is the pressure reducer which is attached to the filter, which is itself attached to the swivel-t. These three bits are the only parts that have to be removed in the winter. |
 |
The final touch is adding a timer to each line. I will start by watering every other day for 10 minutes and modify from there.    |
Subscribe to:
Comments (Atom)


